Gathering the Necessary Tools and Equipment
Tools and Equipment for a Successful Ring Doorbell Installation
Installing a ring doorbell doesn't have to be complicated, and much of your success starts with having the right tools and equipment on hand. Whether you're setting up a new video doorbell or replacing an existing doorbell, assembling these items will make the process more efficient and smooth.
Gathering the necessary tools consists of simple hardware commonly found in a toolkit. Here's what you'll need:
- Screwdriver: A Phillips head screwdriver is essential for securing the mounting bracket with screws.
- Drill: If you're mounting on a wall or any surface that requires new holes, a drill will be required to secure your device.
- Level: Ensuring your bracket is level isn't just about aesthetics but also functionality.
- Tape Measure: For precision, especially when calculating the perfect height for your ring doorbell.
- Power Drill Bits: These will be necessary if you need to drill into harder materials like brick or concrete.
- Wire Extenders: Useful if your existing doorbell wires are not long enough to reach the new doorbell position.
- Voltage Tester: Especially important if you're installing a doorbell wired to ensure power has been turned off before starting work.
Beyond tools, your ring doorbell package should include components like the mounting bracket, bracket screws, and a battery for the doorbell generation that uses one. Additionally, ensure the ring device is fully charged before attempting to install ring.
Safety is paramount, so always turn power off to your existing chime before dealing with any doorbell wires. This step is crucial to avoid any risks while getting everything prepared for your ring installation. Remember, taking the time to gather these essentials will save you significant hassle during the setup process.
Choosing the Right Location for Your Ring Doorbell
Optimal Placement for Your Video Doorbell
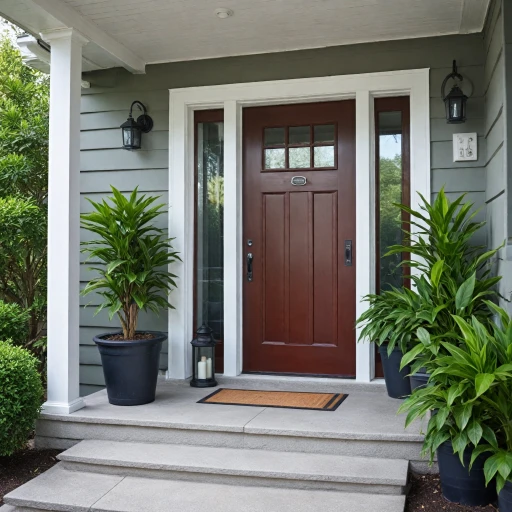
Deciding where to mount your ring video doorbell is crucial for achieving the best field of view and overall performance. Balancing factors such as visibility, accessibility, and power source helps in making efficient choices. Here's what to consider for optimal positioning:
- Height and Angle: Typically, installing the doorbell at chest height (around 48 inches from the ground) will provide the best video coverage. The downward tilt ensures it captures approaching visitors' faces.
- Existing Doorbell Location: If you have a wired doorbell setup, consider how the existing doorbell can influence the placement of your new device. Utilizing existing doorbell wires can streamline installation while maintaining aesthetic appeal.
- Accessibility: Ensure your doorbell is within reach for easy access, especially if it requires a battery swap. For battery-operated models, proximity to a power source is less critical compared to a wired setup.
- Drill and Screw Placement: Make sure there is enough clearance for drilling holes and securing screws when attaching the mounting bracket to the wall.
- Security and Coverage: For tighter security and extensive area coverage, the selected position should allow the video doorbell's camera to survey entryways effectively.
Considering these factors will not only ease the installation process but also enhance your ring video doorbell's security features by maximizing its field of view and monitoring capabilities. For comprehensive guidance on doorbell setup, keep exploring resources like this detailed guide.
Installing the Mounting Bracket
Positioning the Mounting Bracket Correctly
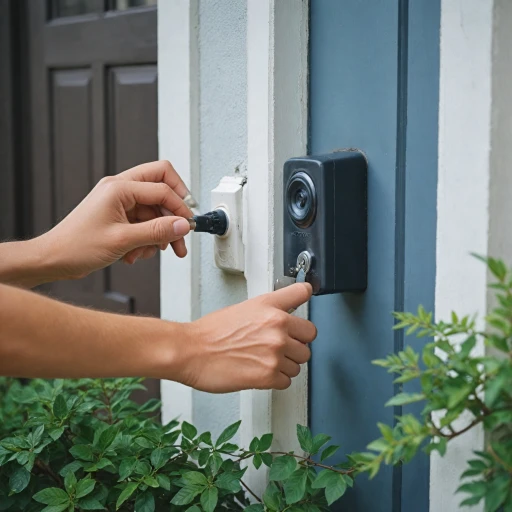
When it's time to secure your ring video doorbell, focusing on how to mount it effectively becomes crucial. Proper installation of the mounting bracket plays a pivotal role in ensuring your device functions seamlessly. Before you grab a drill, ensure the chosen wall can indeed support the setup.
Start by aligning the mounting bracket with any existing holes or marks on the wall where your previous doorbell may have been. Using the template provided with your ring device will help guide you into aligning everything correctly. If there aren't preexisting holes or the past fixture is incompatible with your new ring doorbell generation, you will need to use a drill to make fresh ones.
Drilling and Securing with Screws
With either existing holes or new ones, carefully use the drill to ensure the mounting bracket sits flush against the wall. Insert the screws to secure the bracket tightly. Safety is paramount, so ensure no wires are in the way that could be damaged during this drilling process. The whole operation should result in the bracket being stable enough to support the doorbell.
For those opting for a wired setup, it’s important to thread the doorbell wires through the appropriate openings in the mounting bracket during this step. By ensuring a snug but not overtightened fit, you'll facilitate both effective connection and a neat installation.
Setting Up for Wireless or Battery-Operated Devices
If employing a wireless or battery-operated version of a ring device, merely focusing on the secure attachment of the bracket is critical. This method emphasizes a swift installation without the need for engaging with the doorbell wires unless adding a chime is in your plans. Once affixed, the setup allows the seamless connection to power and app configurations, which are addressed further in subsequent steps.
Attaching the Ring Doorbell to the Bracket
Connecting the Doorbell to the Bracket with Precision
Once you've securely installed the mounting bracket, you're ready to attach the video doorbell. This step is crucial in ensuring your device functions optimally, offering both security and convenience. The process involves a few simple actions:- Aligning the Device: Before securing the video doorbell, make sure it aligns perfectly with the mounting bracket. This will help in running a smooth power connection, crucial for both battery and wired variants.
- Utilizing the Screws: Each ring doorbell comes with screws that are designed to fit the mounting bracket securely. Use these along with a drill to ensure the device holds firm. Remember, creating neat holes in the wall prior to screwing in will give a polished look and better stability.
- Attaching the Wires: For those installing a wired version, connect the existing doorbell wires to the terminal screws located at the back of the ring device. Pay attention to the orientation of the wires; this ensures the video quality is not compromised, and the doorbell chime functions well.
- Securing the Ring Device: Once connected, gently place the doorbell onto the bracket. It should slide or click into place, depending on the version. Secure it with additional screws provided to prevent any unwanted detachment due to environmental factors, such as wind or accidental knocks.
- Checking Alignment: After attaching, ensure the doorbell is upright, and the video lens isn't obstructed. This alignment is imperative for effective monitoring and enhanced security.
Setting Up the Ring App and Connecting to Wi-Fi
Download and Open the Ring App
To begin setting up your Ring video doorbell, the first step is to download the Ring app. It’s available on both iOS and Android platforms. Once installed, open the app and create an account if you don’t have one yet. This app will be your main interface for managing your doorbell and other Ring devices.
Connect to Your Wi-Fi Network
With the Ring app open, follow the on-screen instructions to connect your doorbell to your home Wi-Fi network. Make sure your Wi-Fi signal is strong at the doorbell's location. A weak signal could affect the performance of your video doorbell, leading to delays or interruptions in video streaming.
Power Up Your Ring Device
Depending on your installation choice, you may have either a battery-powered or wired doorbell. If you opted for the battery version, ensure the battery is fully charged before proceeding. For wired installations, ensure the power is turned back on after connecting the doorbell wires to the existing doorbell system. This will ensure your Ring device is ready to operate.
Finalize the Setup
Once your Ring doorbell is connected to Wi-Fi and powered, the app will guide you through the final setup steps. This includes naming your device and setting your preferences for alerts and notifications. Make sure to test the doorbell by pressing it to see if the chime sounds and the video feed appears correctly in the app.
By following these steps, you will have successfully set up your Ring app and connected your doorbell to Wi-Fi, ensuring it’s ready to help you monitor your home’s entrance effectively.
Testing and Adjusting Your Ring Doorbell
Ensuring Everything Works as Expected
After the successful installation of your Ring Doorbell, it’s time to verify its functionality. Testing the device is crucial to ensure that it operates as expected, providing you with the security and convenience you desire. Firstly, check that the power supply to your Ring Doorbell is uninterrupted. If your device is battery-powered, make sure it is fully charged. For those with a wired setup, confirm the doorbell uses existing wires and the connection is secure. Loose or corroded wires might cause issues, so double-check their integrity. Next, activate the Ring App on your smartphone or tablet. This step is vital as it will guide you through testing various features of your video doorbell. Once launched, you should be able to see a live video feed from your Ring device. Here’s a simple checklist to follow:- Video Stream Test: Initiate live view in the Ring App to ensure video feed is clear and fluid.
- Motion Detection: Walk in front of your doorbell to test motion detection and notifications.
- Chime Functionality: If you have a doorbell chime, press the Ring button and listen for the sound inside your home. It's important for confirming that the doorbell integrates seamlessly with your existing chime setup.
- Two-way Audio: Review the two-way communication feature by speaking via the Ring App and ensuring audio is clear on both ends.