Understanding Your Ring Doorbell
Getting Acquainted with Your Ring Doorbell
Before diving into the installation process, it's crucial to familiarize yourself with the components and features of your Ring Doorbell. Whether you have a wired or battery-operated model, understanding the basic elements will make the installation smoother.
The Ring Doorbell is a versatile device, offering video surveillance, two-way audio, and motion detection. These features make it a powerful tool for home security. It typically comes with a mounting bracket, screws, wall anchors, and a power source, either a battery or wires for a wired doorbell.
Components and Features
- Video Capabilities: The Ring Video Doorbell streams live video to your smartphone, allowing you to see who is at your door from anywhere.
- Two-Way Audio: Communicate with visitors using the built-in microphone and speaker.
- Motion Detection: Receive alerts when motion is detected at your front door.
- Power Options: Depending on the model, your doorbell can be powered by a rechargeable battery or connected to existing doorbell wires.
Preparing for Installation
Before you start drilling holes or attaching the mounting bracket, consider the power source. If you have a wired doorbell, you’ll need to connect the doorbell wires. For battery models, ensure the battery is fully charged.
Gather the necessary tools, such as a drill, screws, and a screwdriver. If you're mounting directly on a wall, you'll need to use wall anchors and possibly drill pilot holes for the mounting screws. For more detailed guidance, you can explore steps to disable your Ring Doorbell if needed during the setup process.
Once you're familiar with your Ring device and have your tools ready, you can move on to selecting the best location for your doorbell and following the installation steps.
Choosing the Best Location for Your Ring Doorbell
Finding the Perfect Spot for Your Ring Device
When it comes to setting up your ring device, selecting a strategic location is crucial for optimal performance. The right placement ensures comprehensive video coverage, effective motion detection, and easy access to devices and features through the ring app.- Visibility and Coverage: Ensure the spot you choose provides a clear view of your front entrance or the area you wish to monitor. This will maximize the benefits of your video doorbell.
- Height and Angles: Mount the ring device at a recommended height of approximately 48 inches off the ground. This height captures facial details and provides a broad field of view.
- Avoid Obstacles: Check that no large objects (like walls or plants) obstruct the view of the video doorbell. This ensures the video footage remains uninterrupted.
- Proximity to Power Sources: If you’re installing a wired doorbell, ensure it’s near existing doorbell wires or a power source. This will simplify your setup process.
- Wall Material Considerations: Whether you're mounting directly on a wall or using a bracket, ensure that the mounting surface can support the screws easily. You may need wall anchors for stability.
Step-by-Step Guide to Installing Your Ring Doorbell
Initiating the Ring Setup
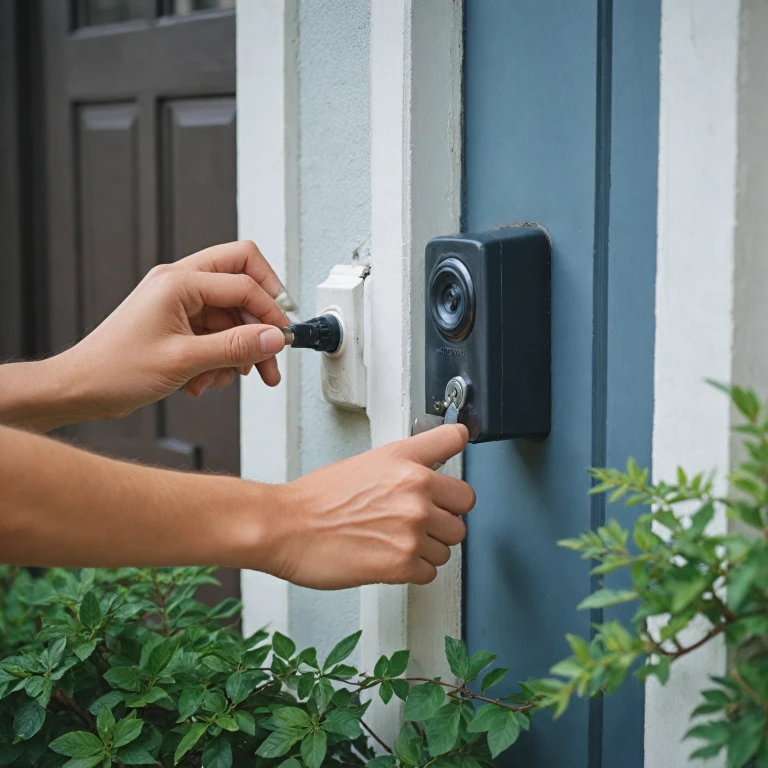
First, gather all the tools and components that were included with your ring device. Inside the kit, you should find the mounting bracket, screws bag, wall anchors, and security screws. Depending on the model of your video doorbell—whether it's a wired doorbell or battery doorbell—your equipment may vary slightly.Preparing the Mounting Area
Selecting the spot for installation is just the beginning. After choosing the perfect location for your ring device, it's time to prepare the site for mounting. Begin by marking where the holes for the screws will go. It's recommended to drill pilot holes in your wall first, especially if you have a solid wall that requires wall anchors. This step ensures the screws are steadily in place during installation.Mounting the Bracket
With your pilot holes ready, proceed to attach the mounting bracket. Use the screws and wall anchors provided if you're installing directly on an exterior wall. For those installing on wood or a similar material, simply secure with the mounting screws provided. Ensure that the bracket is level to maintain the effectiveness of your video doorbell.Attaching Your Ring Device
Now that the bracket is in place, you can attach the video doorbell. Align your ring device with the bracket, ensuring a firm connection. For models featuring a battery, make sure it is properly charged before attachment. For those opting for a wired doorbell installation, connect the doorbell wires to the ring device as indicated in your device manual. If you're interested in further guidance on the process, from start to finish, consider exploring a comprehensive guide to Ring Doorbell Kits that offers detailed insights and recommendations.Connecting Your Ring Doorbell to Wi-Fi
Establishing a Stable Wi-Fi Connection for Your Device
To ensure that your Ring Video Doorbell works seamlessly, you must connect it to your Wi-Fi network. Start by opening the Ring app on your smartphone or tablet. Your device will guide you through the Wi-Fi setup process. Make sure your phone is connected to the same Wi-Fi network that your Ring Doorbell will use.Troubleshooting Network Connectivity
If you encounter issues connecting to your Wi-Fi, consider these steps:- Check Your Wi-Fi Signal: Ensure your Wi-Fi router is close enough to the Ring device. A strong signal is crucial for video streaming.
- Restart Your Router: Sometimes, a simple restart can resolve connectivity issues.
- Network Settings: Ensure that your network supports 2.4 GHz, as many Ring devices don't support 5 GHz.
Ensuring Power Sufficiency for Connectivity
Whether you have a wired doorbell or a battery doorbell, ensuring sufficient power is key for consistent operation. If you’re using a battery-powered model, check that it's adequately charged. For a wired doorbell, double-check that the wiring is intact.Ensuring Compatibility with Existing Infrastructure
While installing, you might encounter challenges if trying to integrate with an existing doorbell setup. Be sure that all wires are properly connected and compatible with your Ring device. In case of any installation hiccups, explore the comprehensive guides dedicated to these topics.Leveraging the Features of the Ring App
Once connected to Wi-Fi, explore the functionalities available on the Ring app to maximize your device's potential. From here, you can configure settings, receive alerts, and ensure your Ring Doorbell is functioning optimally. This guide should help streamline your Wi-Fi connection and make your installation process smoother. With these steps, your device should be up and running without a hitch.Troubleshooting Common Installation Issues
Addressing Installation Challenges
Installing your Ring doorbell can be straightforward, but sometimes you might encounter some hiccups. Here are a few common issues and how to troubleshoot them.
Power Problems
If your Ring device isn't turning on, check the power source. For a wired doorbell, ensure the doorbell wires are properly connected. If you're using a battery doorbell, make sure the battery is fully charged. Sometimes, a simple reset by removing and reinserting the battery can solve power issues.
Wi-Fi Connectivity Issues
After installation, connecting your Ring video doorbell to Wi-Fi is crucial. If you're having trouble, ensure your Wi-Fi signal is strong enough at the doorbell's location. You might need to adjust your router's position or consider using a Wi-Fi extender. Also, double-check that the network details in the Ring app are correct.
Mounting and Alignment
If the video feed isn't capturing the desired area, you might need to adjust the mounting bracket. Ensure the bracket is securely attached to the wall using the included mounting screws and wall anchors. If the video doorbell isn't aligning correctly, consider using the wedges included in the install kit to adjust the angle.
Chime and Sound Issues
If the chime isn't ringing when the doorbell is pressed, verify the connections if you have a wired setup. For a battery-powered device, ensure the Ring app settings are correctly configured to activate the chime. Sometimes, simply resetting the device can resolve sound issues.
Drilling and Mounting Challenges
When mounting directly to a wall, ensure you're using the right drill bit size for the pilot holes. This will help prevent cracking or damaging the wall. If you encounter resistance, check for any obstructions or consider repositioning slightly.
By addressing these common issues, you can ensure a smooth installation process and enjoy the full benefits of your Ring doorbell. Remember, each installation is unique, so don't hesitate to refer back to the previous sections for guidance on choosing the best location and step-by-step installation.
Enhancing Security with Your Ring Doorbell
Maximizing Safety and Peace of Mind
Once your Ring Doorbell is successfully installed and connected to Wi-Fi, enhancing its security features can give you added peace of mind. While the installation process covers the basics, taking a few extra steps can further safeguard your property.
Secure Mounting: Ensure that the doorbell is tightly secured to the mounting bracket using the included mounting screws or any additional security screws from your screws bag. This added security prevents theft of the device.
Proper Use of Power Sources: If using a wired doorbell configuration, regularly check the doorbell wires and connections to ensure there’s no damage or wear. For a battery doorbell, monitor the battery levels via the Ring app to prevent a drop in surveillance due to power loss.
Expand Your Coverage: Consider adding additional Ring devices or a Ring alarm to cover blind spots around your home. The Ring video system can integrate with multiple devices to offer a comprehensive overview of your property.
Optimizing Ring App Settings: Fine-tuning the app’s settings can optimize the functionality of your video doorbell. Adjusting motion sensitivity and zones can reduce false alerts and ensure notifications are relevant. Additionally, enable chime functions to alert you audibly within your home.
Regular Maintenance: Routinely check the wall anchors and screws that secure your doorbell. Tighten any loose screws, and consider re-drilling pilot holes if necessary to maintain wall integrity and stable installation.
By taking these additional steps, your Ring video doorbell system can offer enhanced security and functionality, making your home a safer place.